Course Configuration
LearnNow Portal > Training Courses
Description
As a content creator, I want to be able to create and publish course content so the company employee can assign and add to their learnings.
Applicable User Roles
List of roles that have access or can use this feature.
Content Creator
How To
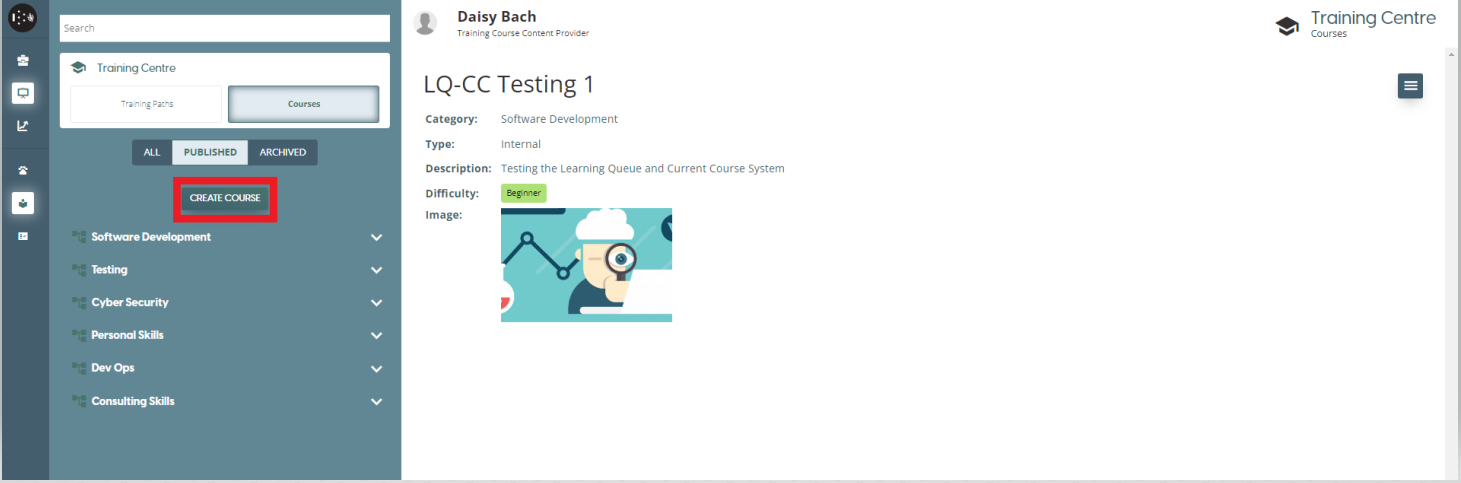
By selecting the ”Create Course” button which is available in the Courses view, a Create Course modal (overlay window) will open which allows for the creation of a course to begin.
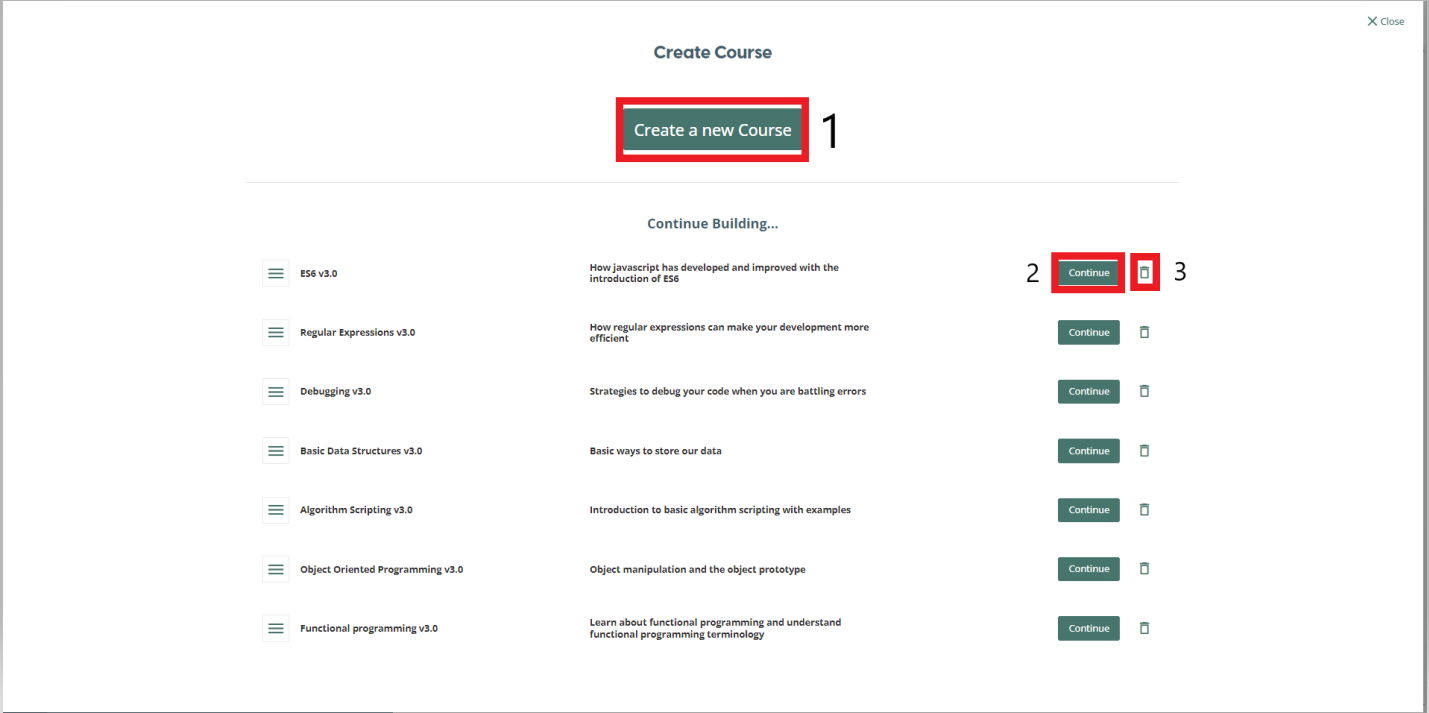
From this view you can click the “Create a new course” button (1) to start creating a new course. You can also select “Continue” (2) from the Continue Building list which lists all the courses currently in the draft state and allows them to be edited, or click on the bin icon (3) to permanently delete a course in the draft stage.
Courses can either be internal or external.
Internal Courses - The content creator creates the modules by compiling materials they have collected themselves from different sources.
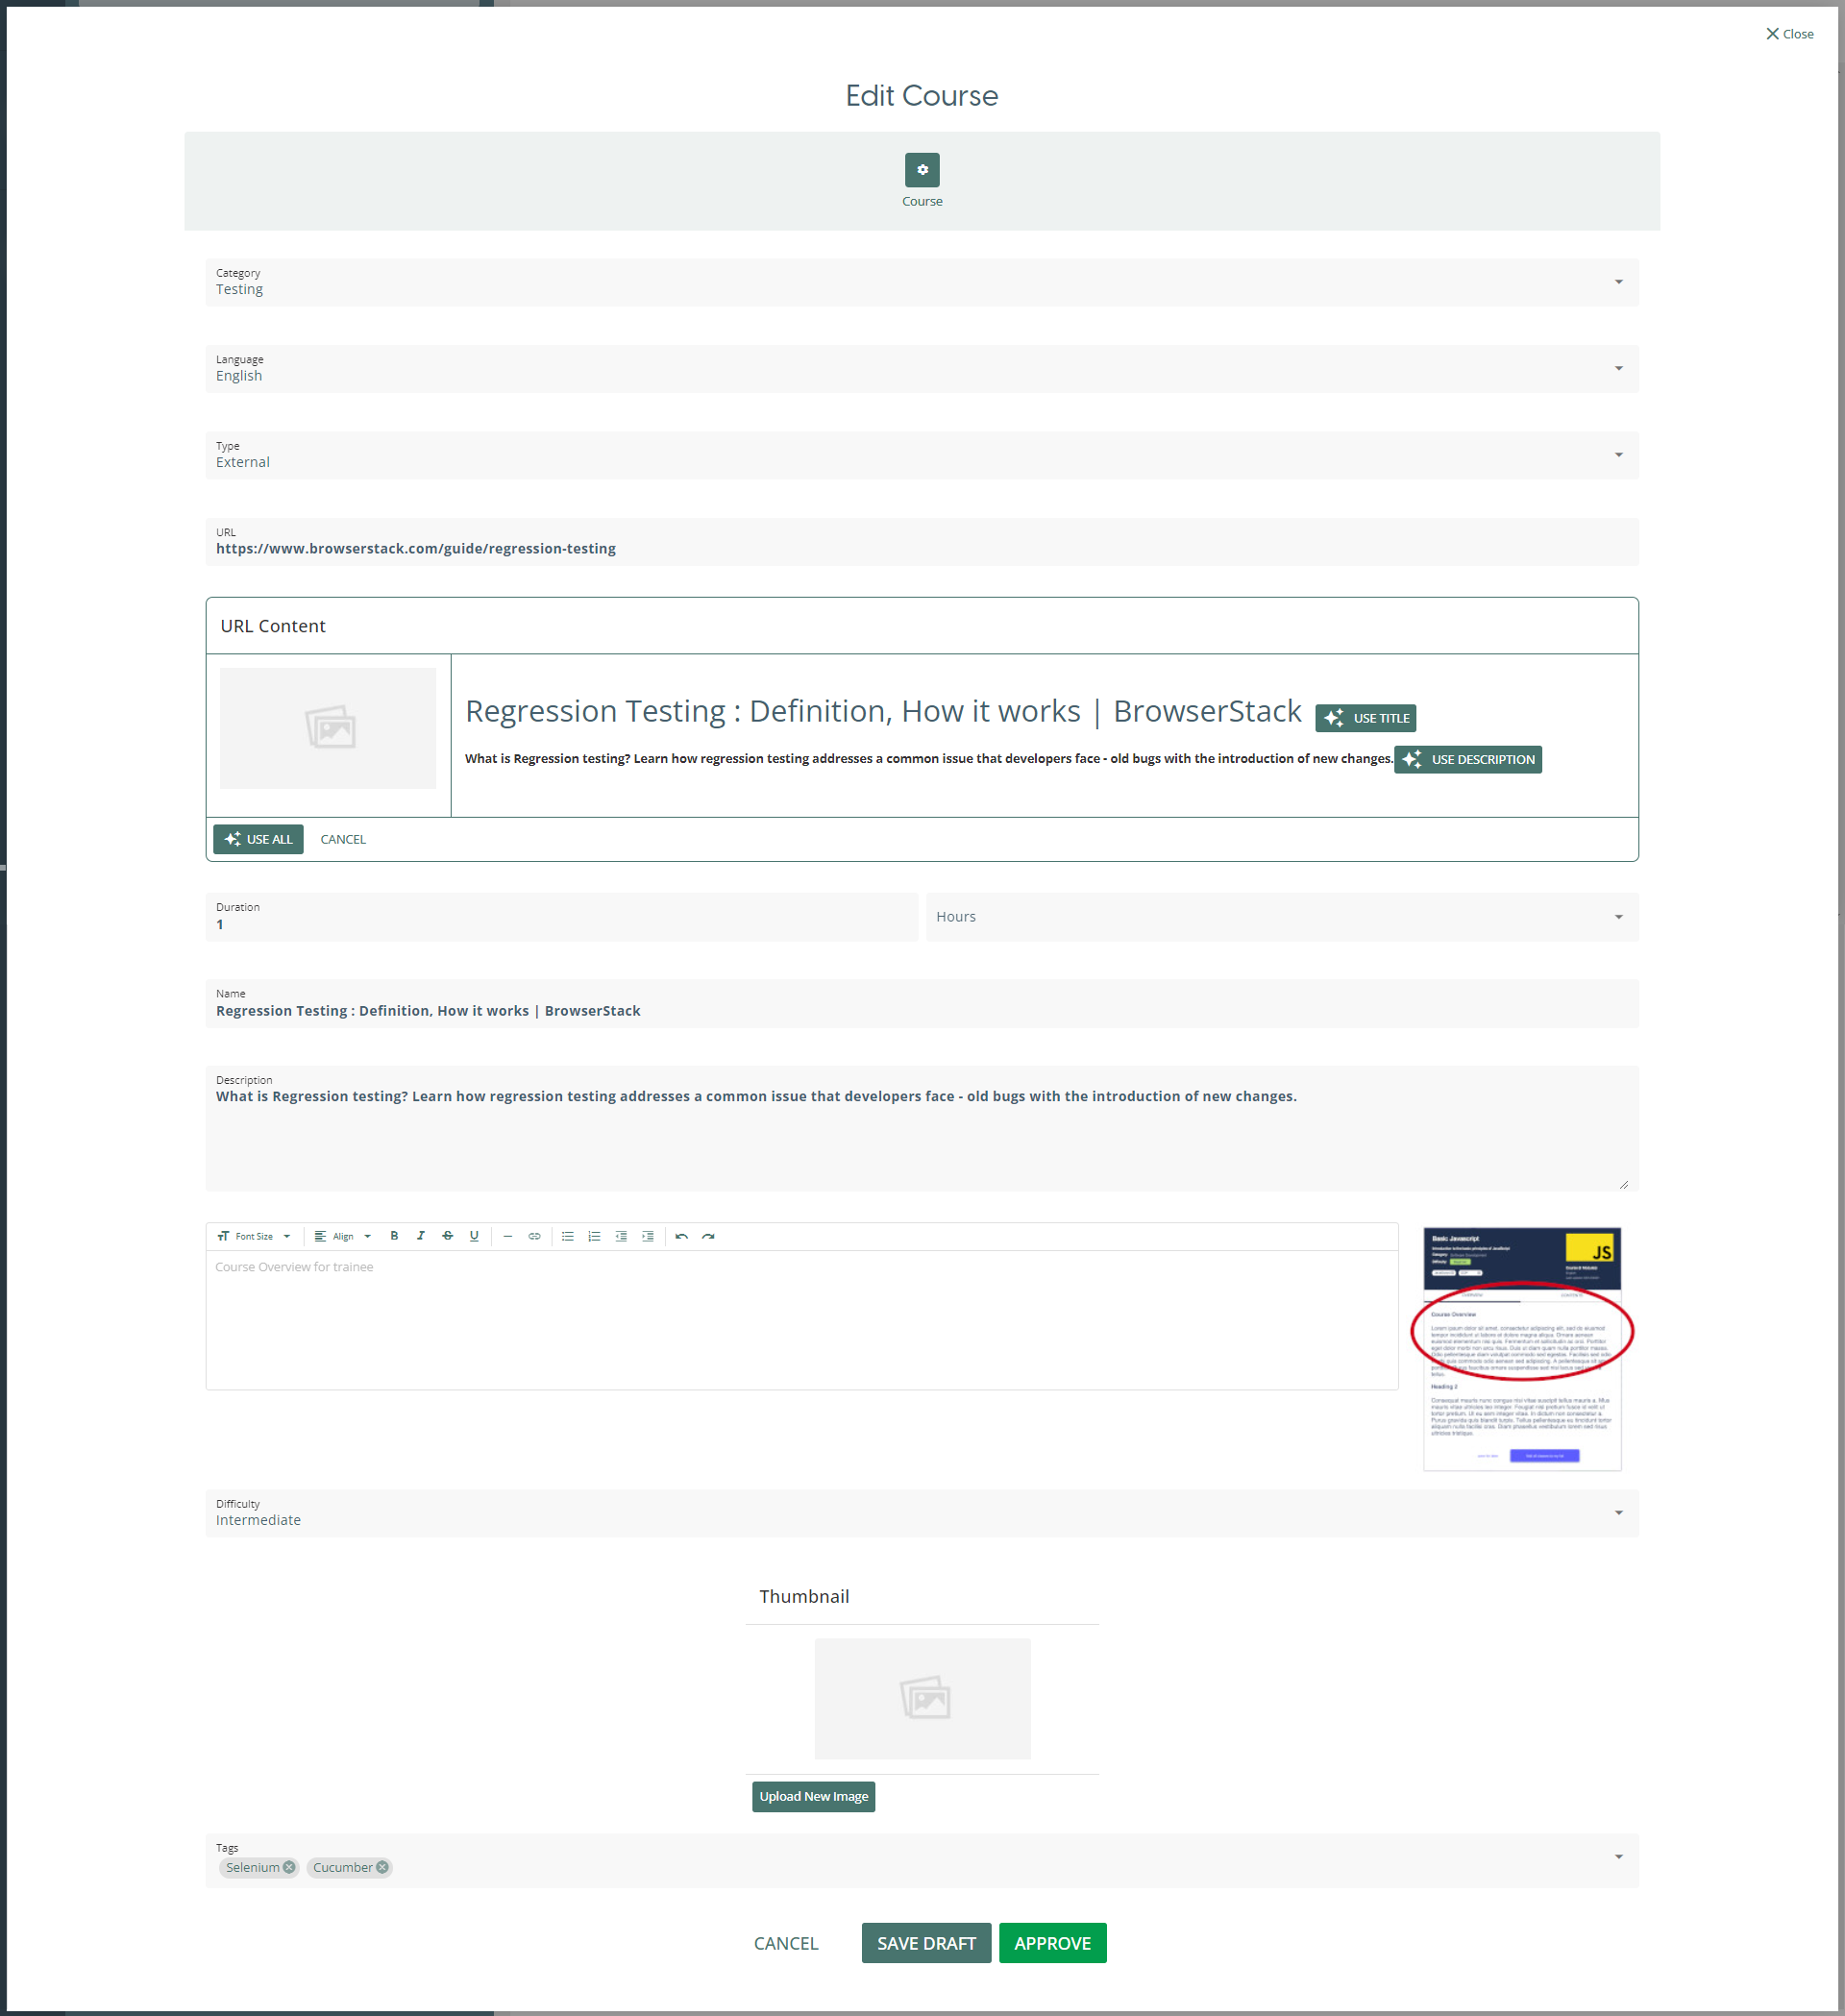
External Courses - If you want the user to complete a course which is hosted on a different site, you can select the type “External” on the Edit Course view. This will change to course editor so that you do not need to add modules or materials to the course. Instead, you must provide a URL to the site that is hosting the material and an estimated completion time for the course in either hours or minutes.
Create a new course (Internal)
Create Course
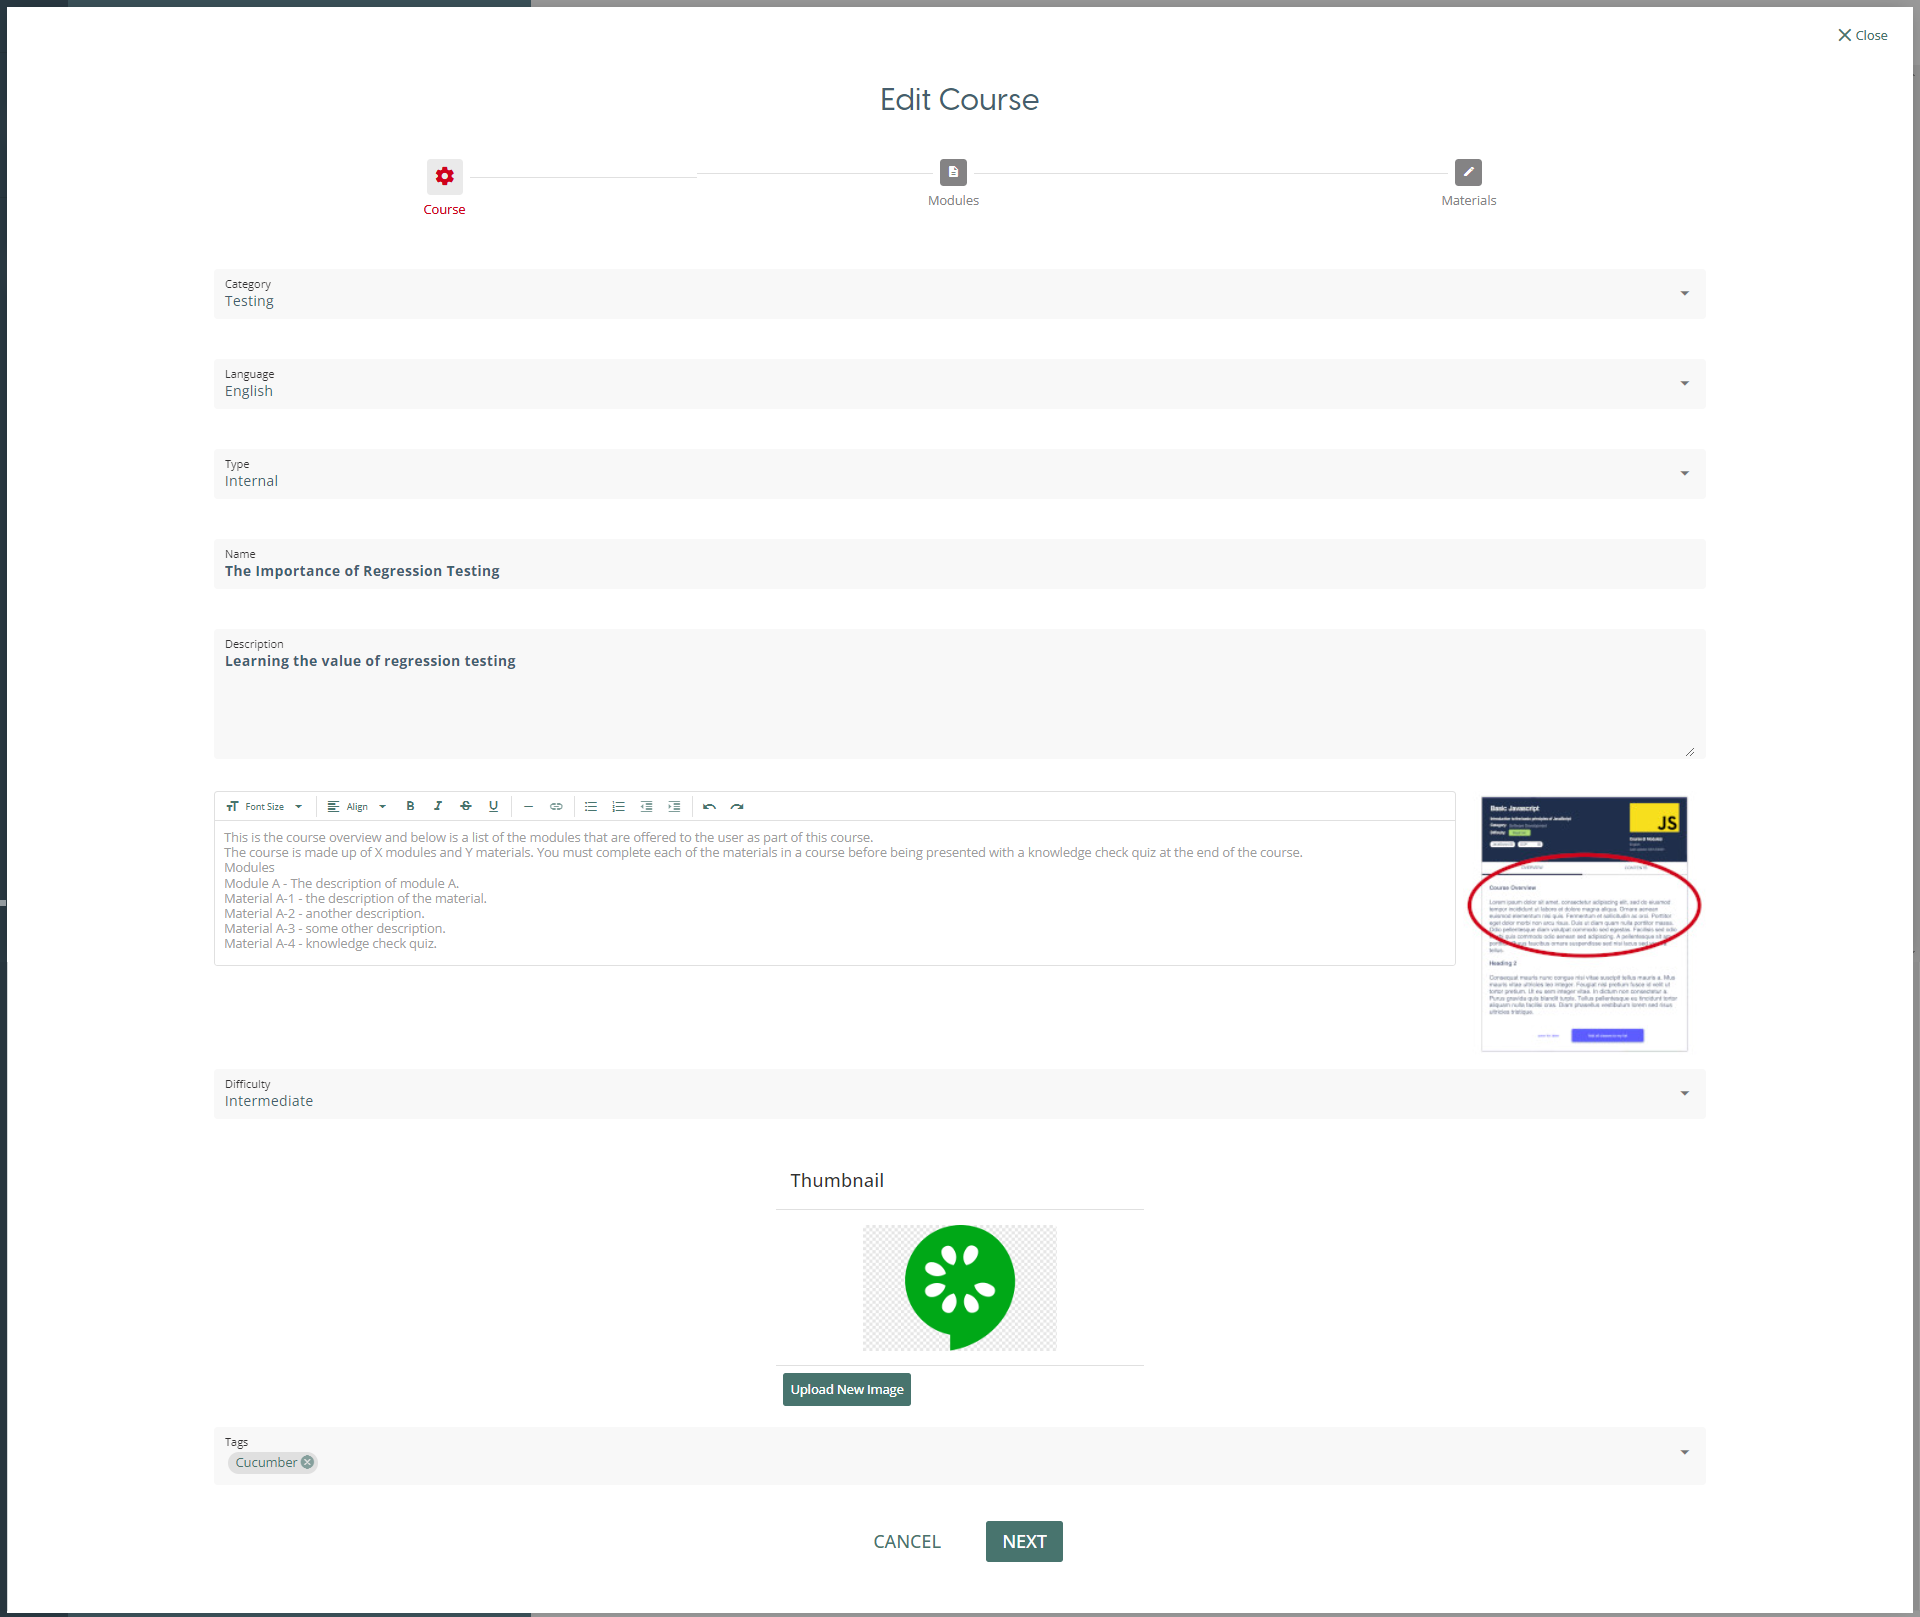
Selecting the “Create a new course” button will bring you to the “Edit Course” view. From here there is a form to fill in to provide the basic information about the course:
-
Category: A fixed list of categories that a course is associated with. This is a mandatory field. If you wish to change the items in the list, please email support@skillsnow.com.
-
Language: The language the course content is produced in.
-
Type: A course can either be internal or external. With an internal course, you add the modules and materials yourself on the next steps.
-
Name: The title you wish to give the course. This is a mandatory field.
-
Description: A brief description of the contents of the course.
-
Course Overview: This is what the user sees when they select the “Preview Course” option from the burger menu. A more detailed description of the modules and the materials within them.
-
Difficulty: Select the difficulty of the course from Beginner, Intermediate or Advanced. This is a mandatory field.
-
Thumbnail: Attach an image to be associated with the course. To upload an image, click “Upload New Image” > “Select Image” > Select an image from file explorer > “Upload Image”. On success you will see a success toaster message informing you the file was successfully uploaded.

- Tags: Attach tags to the course related to the category you have selected. The list of tags available will depend on the category you have selected.
Once you have filled in the form and are ready to move on to the next stage, press the “Next” button at the bottom of the page.
Below is an example of filled in Course form:
Modules
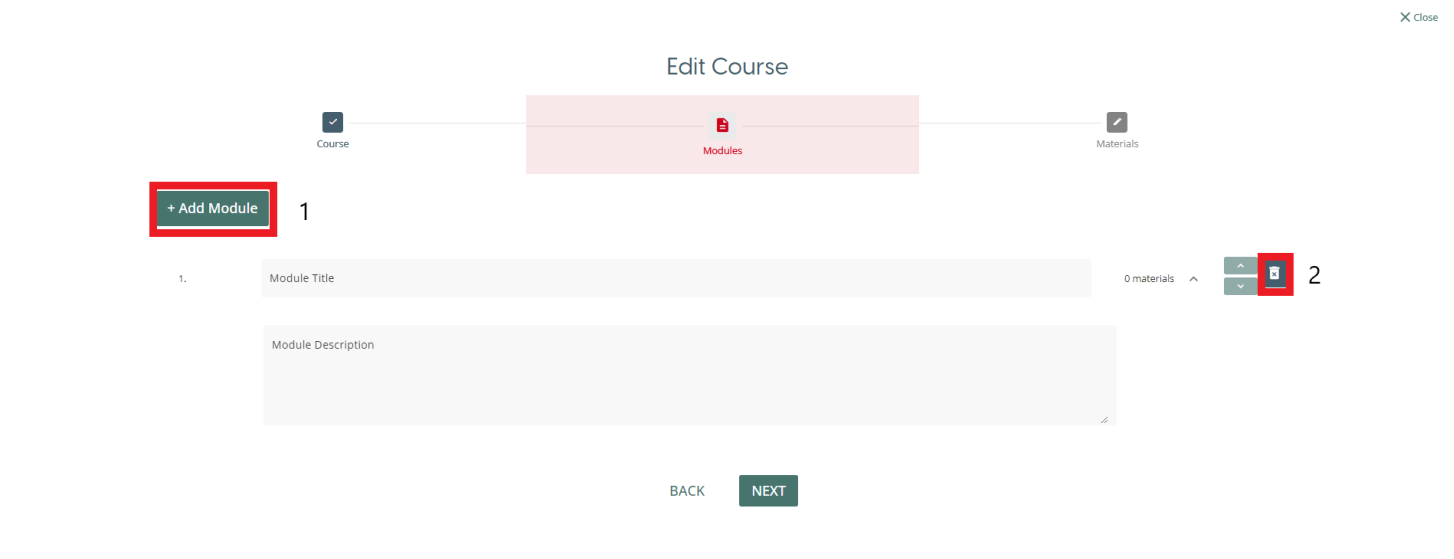
The next step is to add modules to the course. Every course must have at least one module that contains material, you will not be able to publish a course without at least one module assigned.
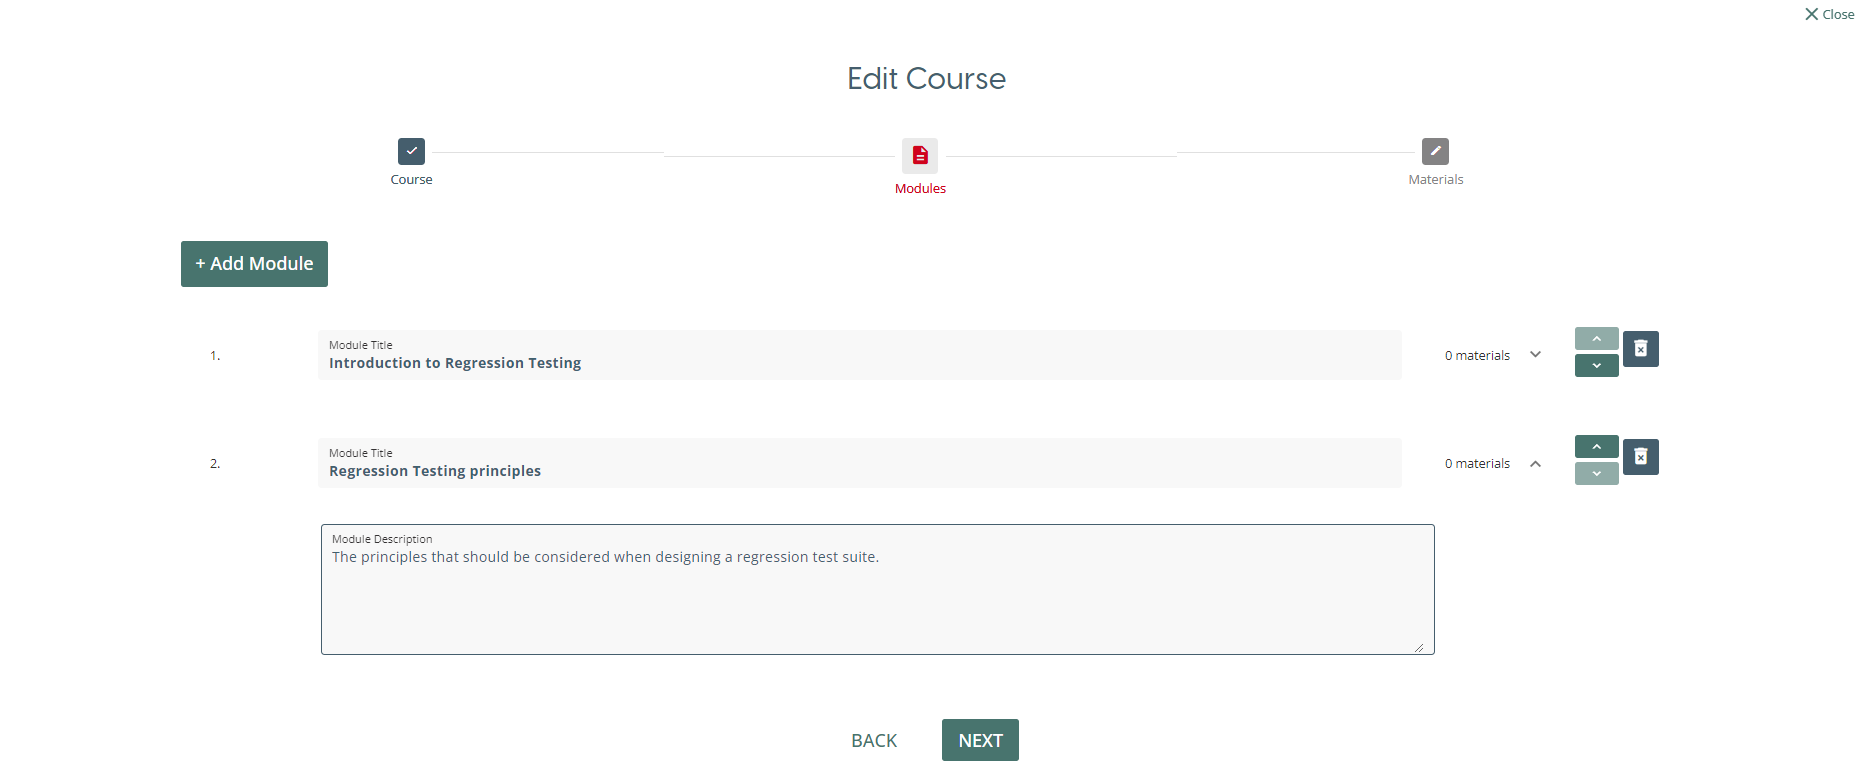
To add a module to a course, you click on the “Add Module” (1) button. This button can be used to add as many modules as required to a course. This adds a form to the window which allows you to name the module and give the module a description based on the content it will be delivering. In order to remove a module, click on the bin icon (2) to remove any particular module.
After adding all the modules required for a course, the final step is to add materials to each module.
Materials
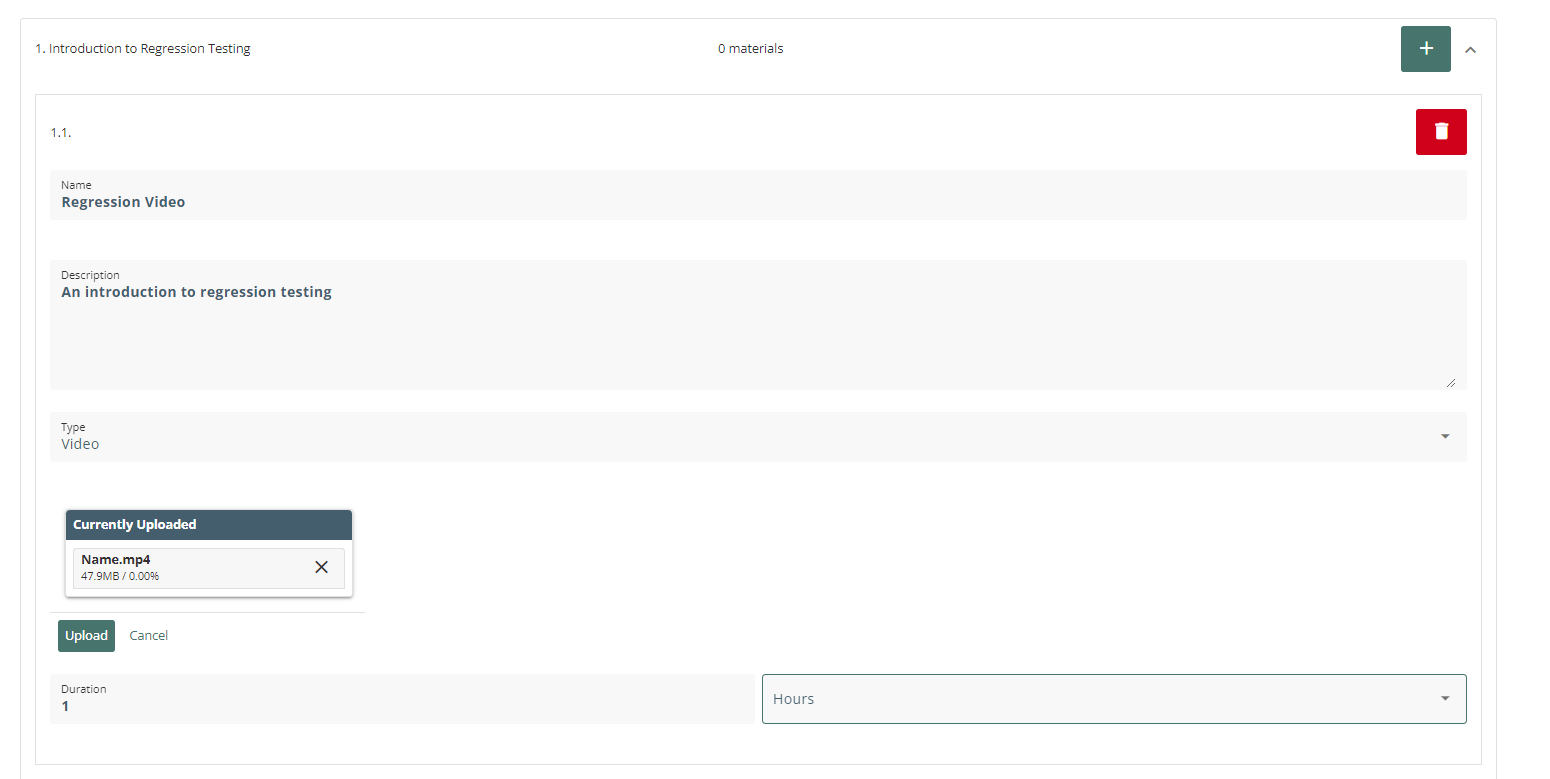
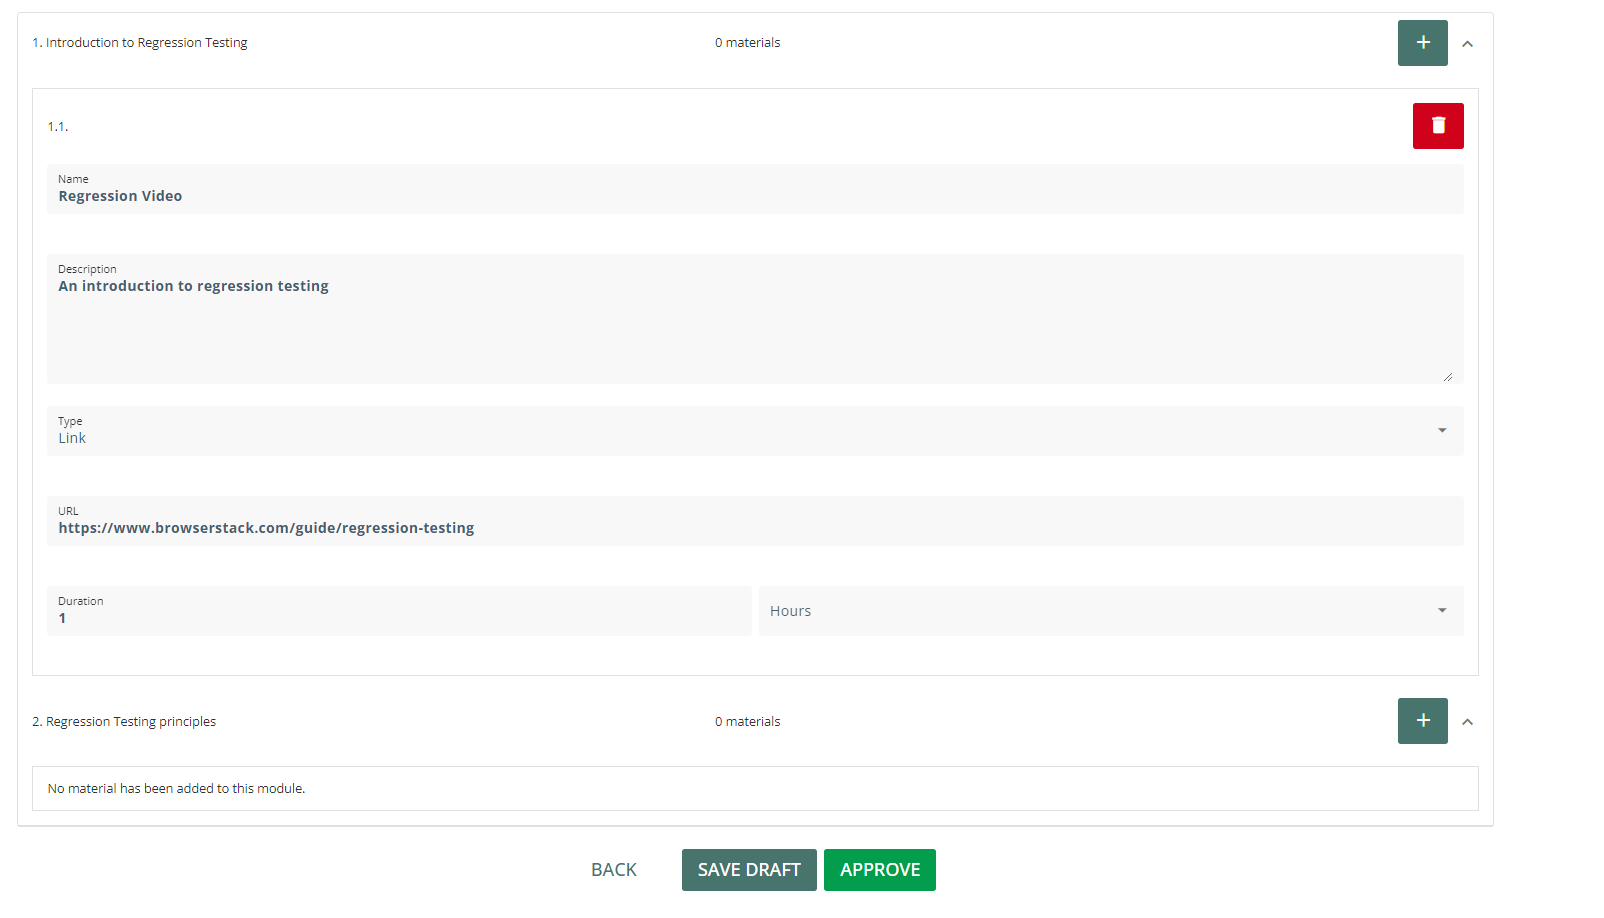
The materials in a course allow for content to be delivered to the user in a variety of formats. Every module on a course must have at least one item of material assigned to it in order to be published. In order to add material to a module, click on the blue “+” (1) button on the module you want to add the material to. In order to remove a material, press the red bin button (2) on the material you want to remove.
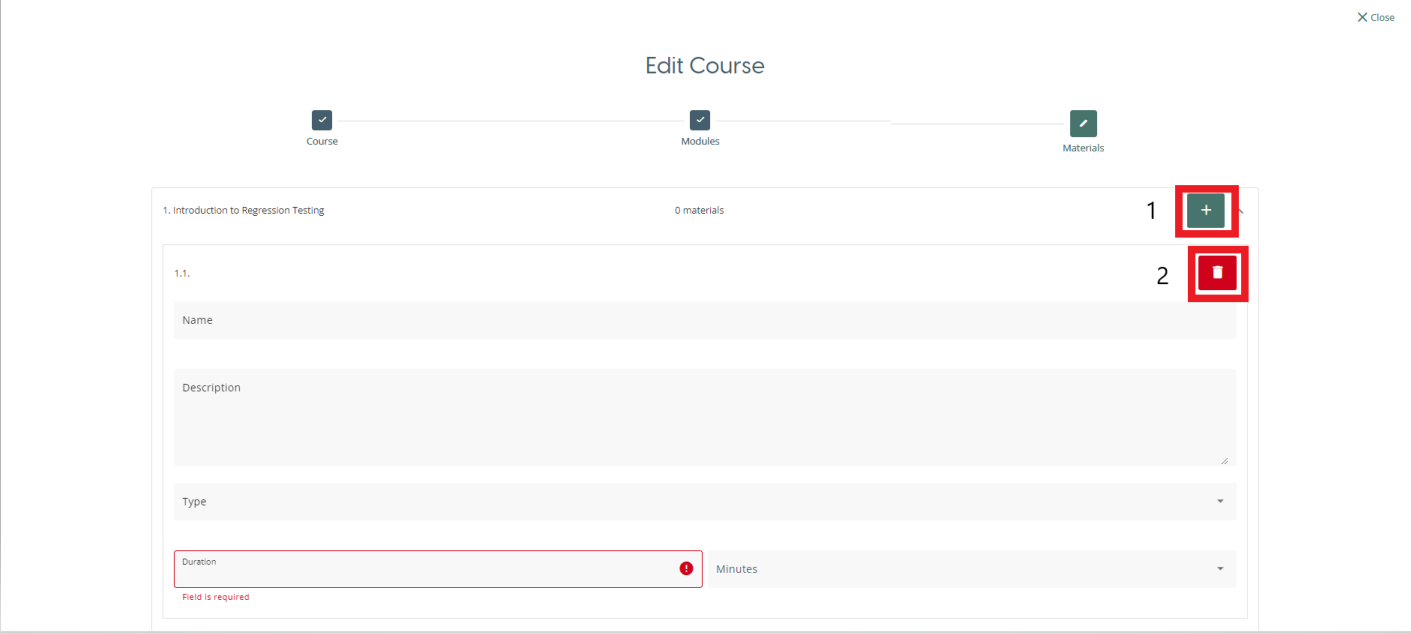
The fields that appear in the form will depend on the format of the material selected. However some fields are shared across all format types:
-
Name: The title you want to give to the material. A required field.
-
Description: A description of the material being delivered.
-
Type: The format the material is delivered in. A required field
-
Duration: The expected time for the material to be finished within. The first field allows you to type in a number, and the second option lets you select between hours and minutes. A required field.
Different options will then be available depending on the the type of material selected:
Video/PDF
These two material types allows you to upload either a video or PDF to be used as a material. Once selected, the window will provide an upload box to upload the material from your computer.
Form
The Form type allows for various different elements to be added to make up the material. The elements included are:
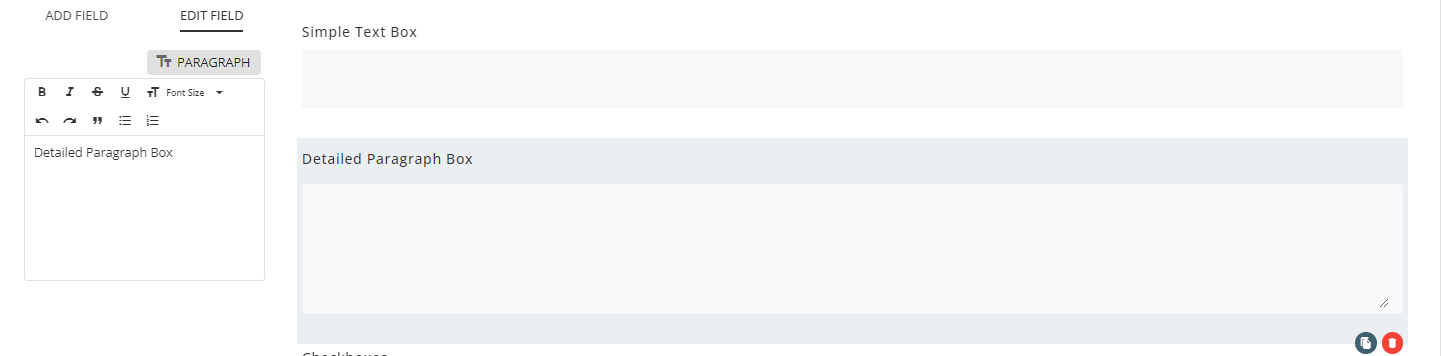
- Text box & Paragraph
You can add descriptions to the text box or paragraph fields using the text editor on the left, which also has options for text formatting.
- Checkboxes
The green “+” button on the left of the window allows for more options to be added, and options can be removed using the red bin button. If you wish to include “Other” as an item in the list, there is a checkbox you can select underneath the green “+” button.
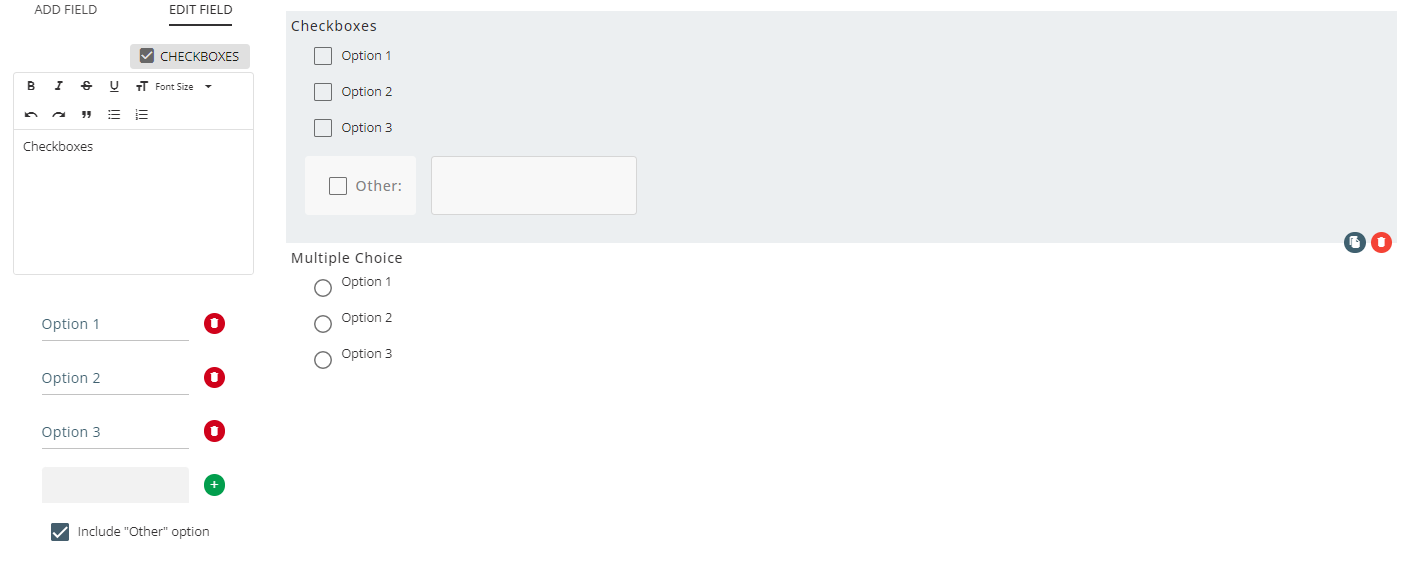
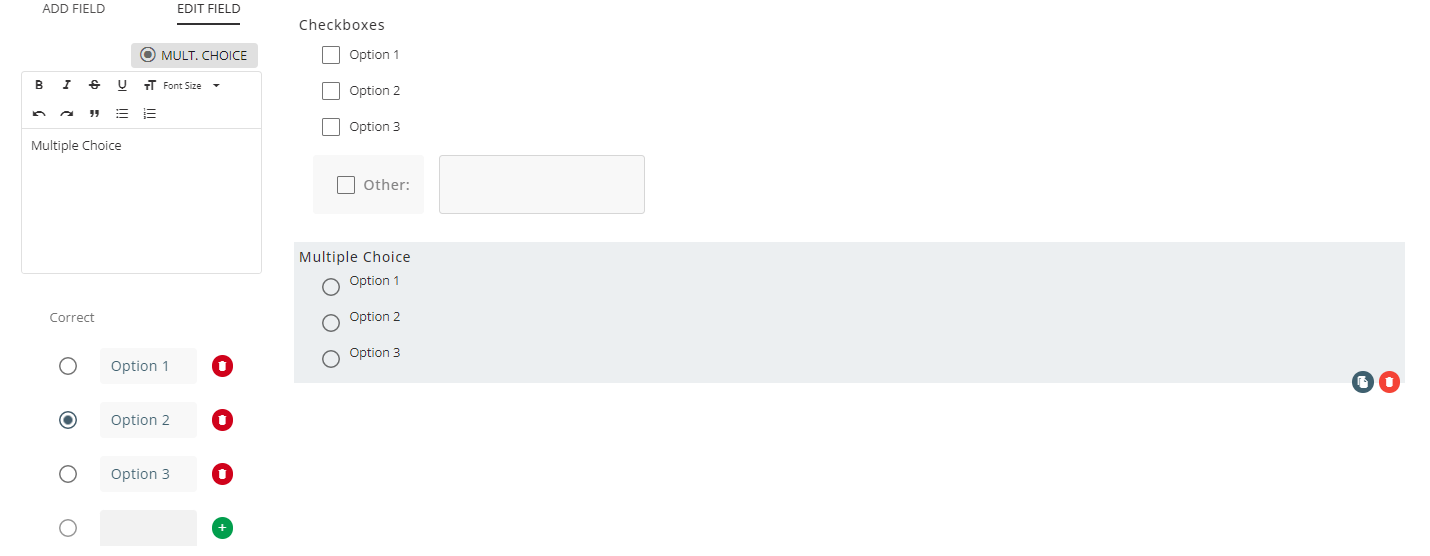
- Multiple Choice
Similar to checkboxes, options can be added with the green “+” button and removed with the red bin icon. In order to select which option is the correct answer, you select the option from the list of options on the left of the screen. In the image below, option 2 has been selected as the correct option.
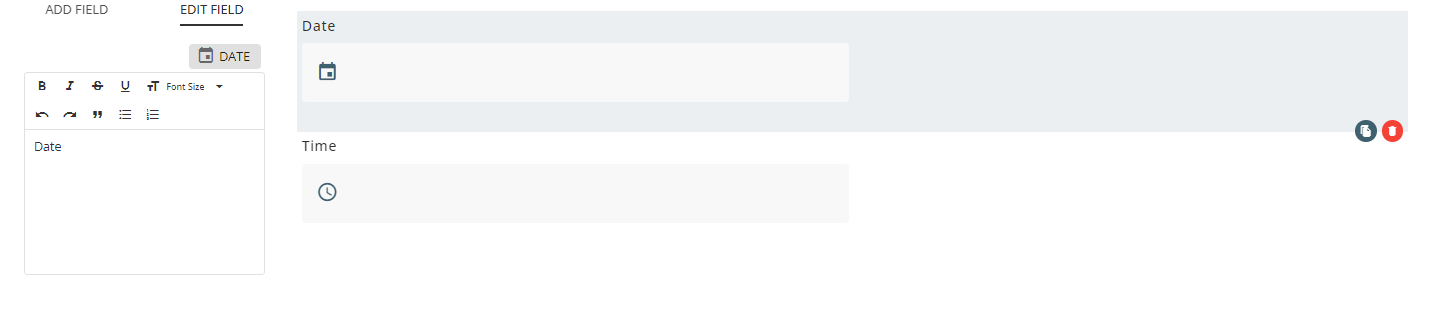
- Date & Time
These fields allow for the user to input either a date or a time in a format compatible with the platform. A title can be given to each field with the text editor on the left of the window.
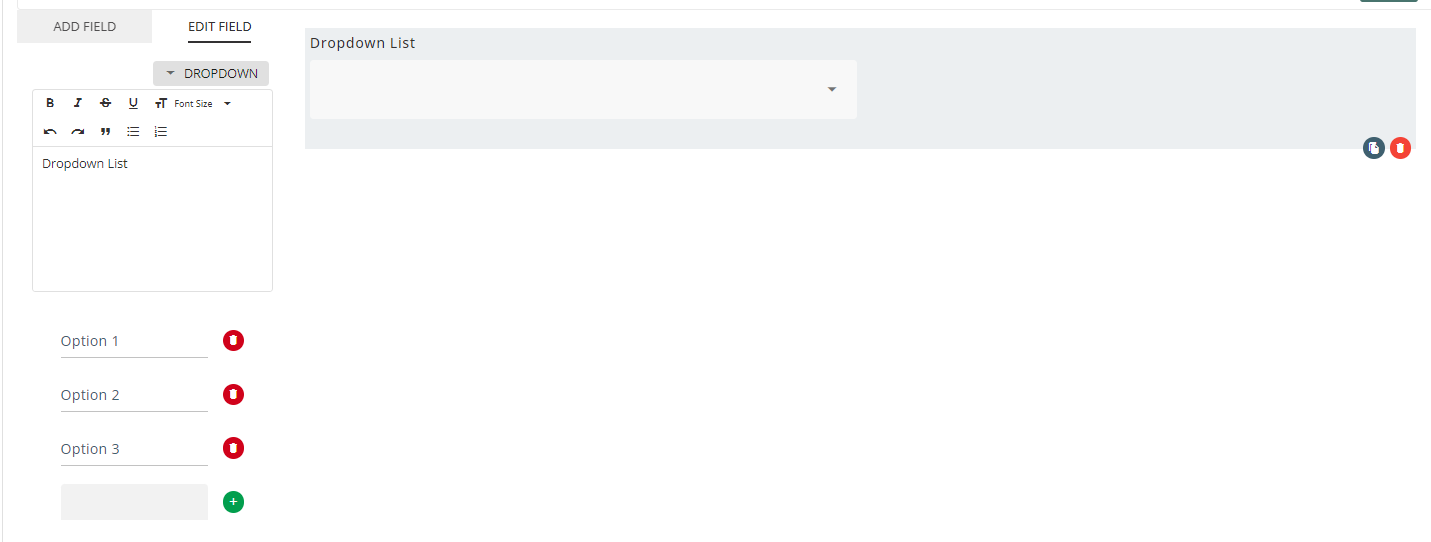
- Dropdown
A dropdown list can also be added to the form. Dropdown list selection options can be added o n the left of the window using the green “+” button and removed using the red bin button.
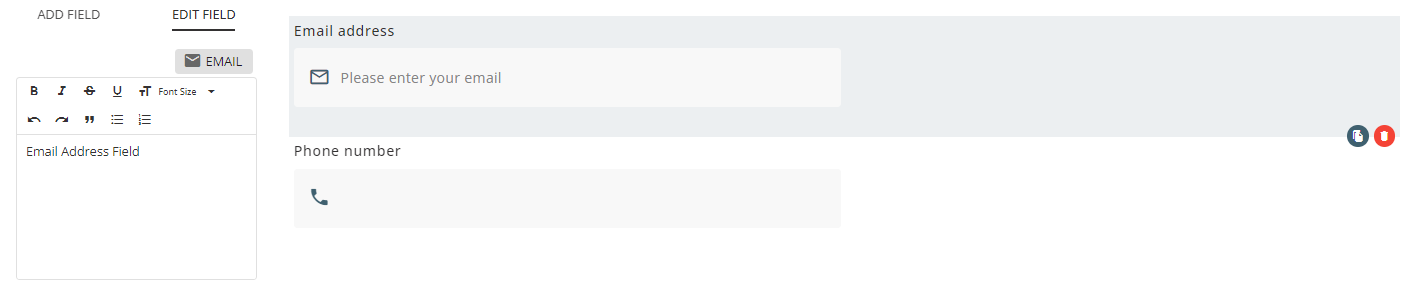
- Email & Phone number
These fields check if the user submission follow a email or telephone number format. Each field can be given a description with the text editor on the left of the window.
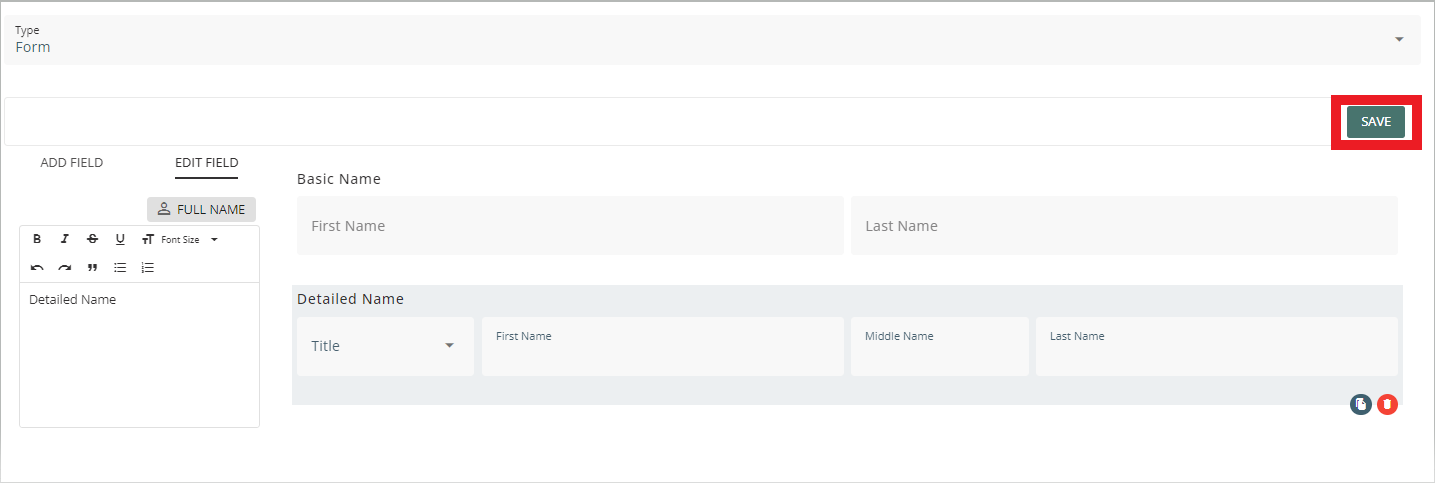
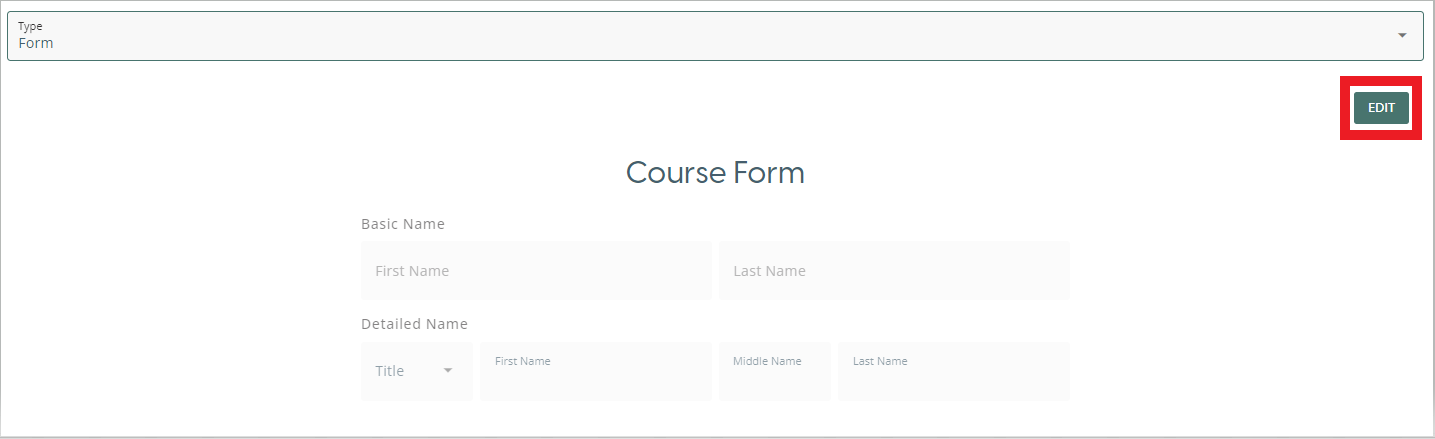
- Name & Full Name
These fields allow for the user to input a name with different levels of detail. “Name” allows the user to input a First name and Last name. “Full Name” gives the user the option to add a title and a middle name to the name.

Once you have finished adding elements to the form, press the blue “Save” button to save the form. In order to change the form once the form has been saved, press the “Edit” button add or remove items.
Quiz
The quiz element allows for a multiple choice quiz to be added to the material. The two fields at the top of the page allow for you to set how long the user has in minutes to complete the quiz and the total number of correct answers to qualify as a pass. Once you have added at least one question, you can use the “Save” button to save the quiz.

To add a field, select the “Add field” option on the left of the window and press the “Mult. Choice” button to add a question to the quiz.

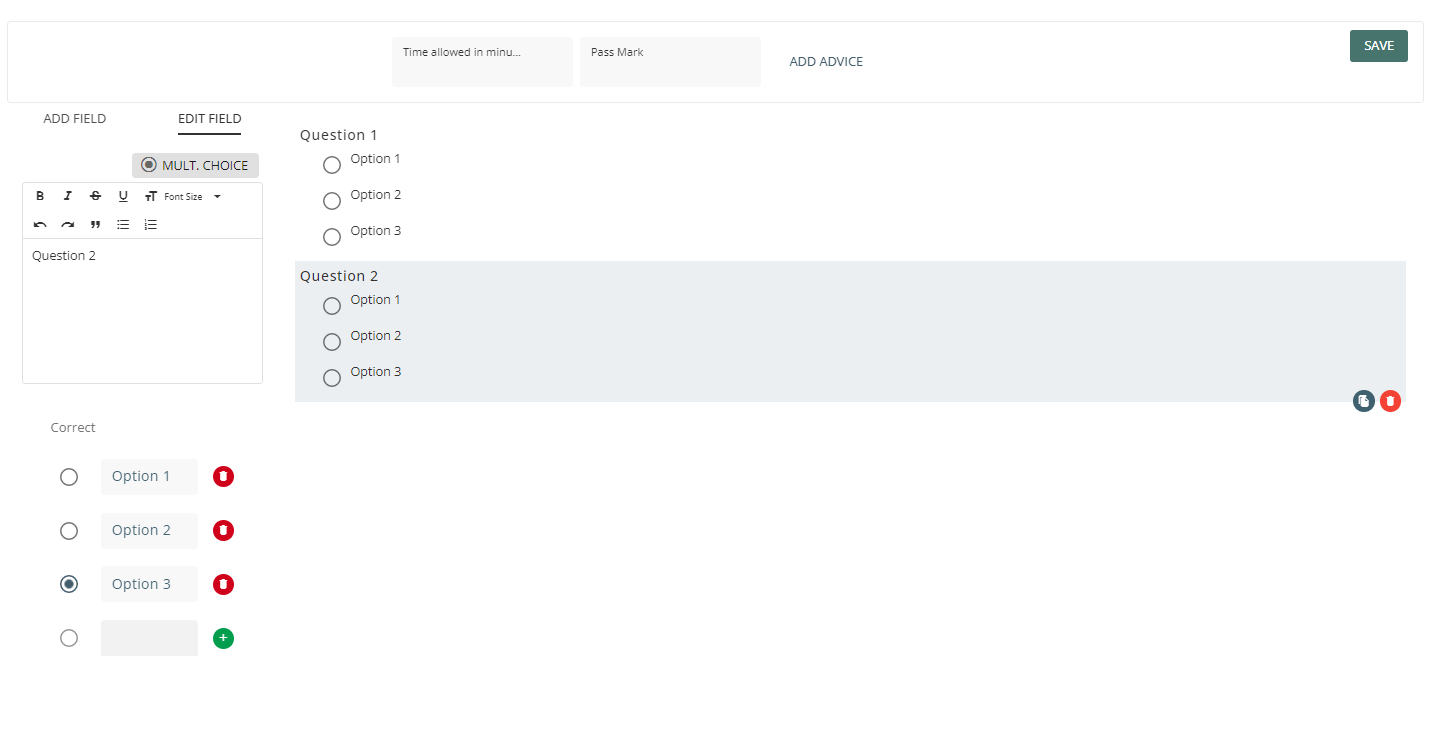
This adds a question to the quiz and takes you to the “Edit Field” view. From here, you can add the question in the text editor on the left, then use the green “+” button to add options to answer the question. In order to select the correct answer for the question, select the option with the radio button on the left of the window. In the image below, Option 3 has been selected as the correct answer for Question 2.
Link
This gives you the option to provide a URL to the user to complete material on an external site. Once the user has completed the material on the external site, they can then mark the material as complete. In order to add an external site as a material, add the sites URL to the URL field.

Publish/Save the course
Once you have finished adding module and materials to the course, you can use the green “Approve” button in the “Materials” view to publish the course to be used for others. If you wish to save your current progress instead, you can click on the “Save Draft” button to save the course as a draft. From the Courses page, you can use the Course Contents option in the burger menu (☰) to run through a course in either the Published or Draft state.
Create a new course (External)
If you want the user to complete a course which is hosted on a different site, you can select the type “External” on the Edit Course view. This will change to course editor so that you do not need to add modules or materials to the course. Instead, you must provide a URL to the site that is hosting the material and an estimated completion time for the course in either hours or minutes.
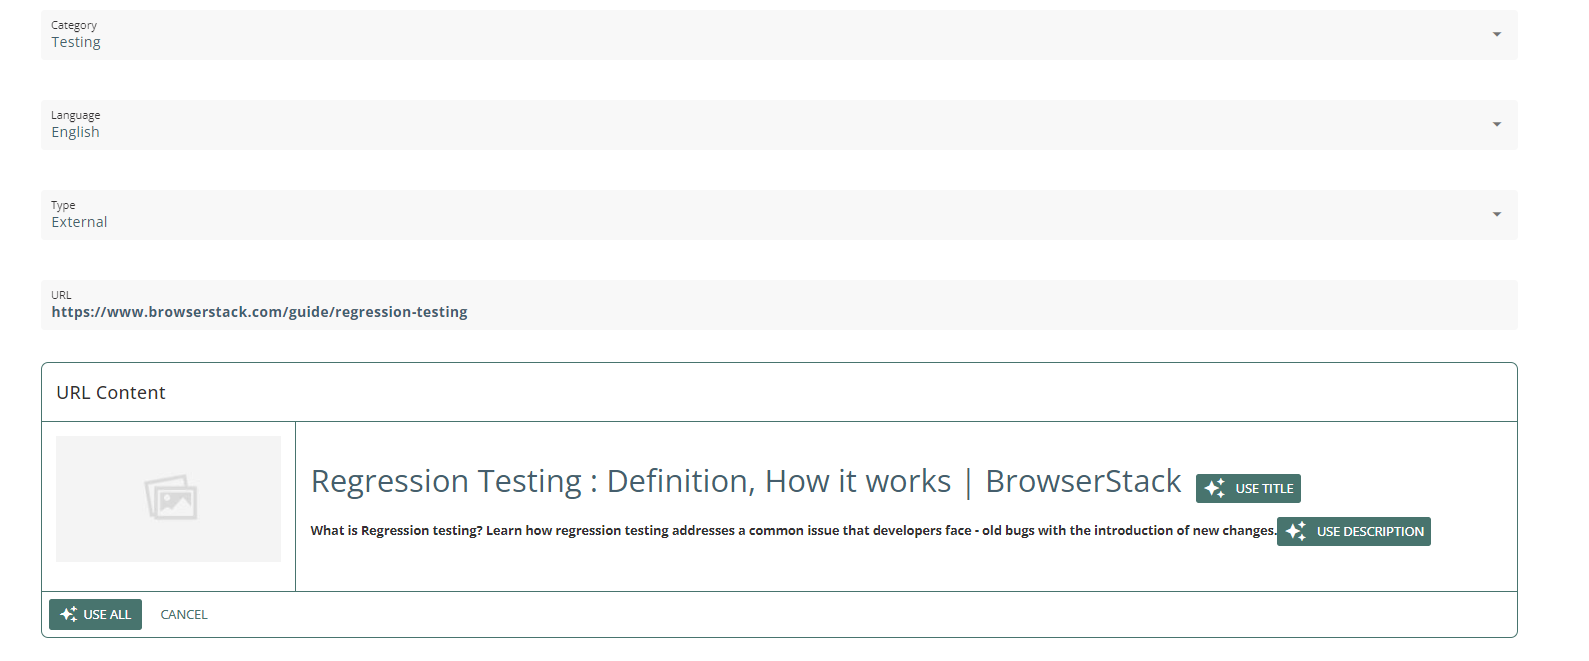
After entering a URL, the platform will offer the ability to grab the title, description or both from the web page.
Once you have filled in all the required data, scroll to the bottom of the page and select “Approve” to publish the course for others to use, or “Save Draft” to save the course in drafts to be edited at a later date.